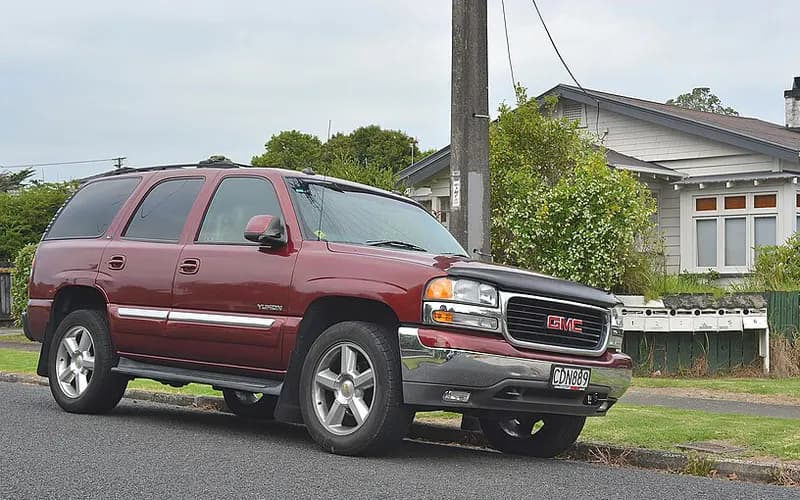
GMC Yukon 2000–2006
Common on this vehicle:Warning lightMisfire or rough idleLoss of engine power, no accelerationLeakNoiseGauge or instrument faultHard start or long crankDoes not start
Record by record
11 records state a cause or a remedy. Each record is shown as short labels in the order fault → finding the cause → correction. Press a label to narrow to the records that state it.
A ribbon is as wide as the records that state both of its ends (only the commonest are drawn). A record that names several symptoms or components runs through each. Orange is records that say the fault came back or was not fixed. Results come from owners’ reports only; one that does not say is “result not stated”. None of this is a likelihood of a cause or a rate at which work succeeds.
Read the records one by one (6)
Known issuesSingle-cylinder misfire (P0300-P0308) and/or chirp, squeak or tick at camshaft speed: worn cam lobe / lifter, valve or valve spring2
Manufacturer communication2002–2006 GMC YUKON DENALI ・ 2018-11-13(4 earlier editions of this document folded here)
Service Engine Soon Lamp, Misfire, Engine Noise Diagnostic Information
1Fault
- Customers may complain of an SES light, engine misfire, and/or engine noise.
- If the SES light is on, there will be a P0300-P0308 DTC with misfires counting on a single cylinder, which may or may not be felt.
- A verified noise is not eliminated by canceling fuel injectors and occurs at camshaft speed (half of crankshaft speed).
2Finding the cause
- Valve Spring: broken
- Active Fuel Management Lifter: failed
- Valve: defective
- Camshaft Lobe: worn
- Lifter Roller: worn
Possible causes
- If SI diagnosis does not isolate the cause, it may be a worn camshaft lobe and/or lifter roller, a sticking valve, valve leakage, a broken valve spring, or a collapsed AFM (Active Fuel Management) lifter.
Steps to confirm (in the document’s order)
- During the noise, press with a wooden hammer handle on the rocker arms at the valve side, push rod side, and side of the rocker to find which one is making noise.
- If pressure on the valve side of the rocker changes the noise, it is most likely a lifter and/or cam lobe concern on that cylinder.
- Measure the cam lobe lift at the push rod side of the rocker arm.
- A good indicator of a sticking valve is engine misfires that continue to count on an aggressive deceleration with engine braking.
- Release the air pressure from the cylinder and work the valve up and down in the guide while turning it 360 degrees; if any binding is felt, a stem to guide clearance concern exists.
3Correction
Repair
- If a worn camshaft lobe or lifter roller is found, follow SI procedures to replace the camshaft and all lifters.
- Also replace the plastic lifter guide for the lifter that had the damaged cam lobe and/or lifter roller.
- Refer to the latest version of PIP4753 for decarboning instructions.
- If a broken valve spring is found, replace the broken valve spring as necessary.
Caution
- If an AFM lifter concern is suspected, refer to the latest version of PIP4568 for additional information.
Read the sentences of the record
From the manufacturer’s document
- Applies to:Applies to GMC Yukon models, 2002 - 2018, with a V8 engine.
- Condition:Customers may complain of an SES light, engine misfire, and/or engine noise.
- Condition:If the SES light is on, there will be a P0300-P0308 DTC with misfires counting on a single cylinder, which may or may not be felt.
- Condition:A verified noise is not eliminated by canceling fuel injectors and occurs at camshaft speed (half of crankshaft speed).
- Cause:If SI diagnosis does not isolate the cause, it may be a worn camshaft lobe and/or lifter roller, a sticking valve, valve leakage, a broken valve spring, or a collapsed AFM (Active Fuel Management) lifter.
- Confirm:During the noise, press with a wooden hammer handle on the rocker arms at the valve side, push rod side, and side of the rocker to find which one is making noise.
- Confirm:If pressure on the valve side of the rocker changes the noise, it is most likely a lifter and/or cam lobe concern on that cylinder.
- Confirm:Measure the cam lobe lift at the push rod side of the rocker arm.
- Repair:If a worn camshaft lobe or lifter roller is found, follow SI procedures to replace the camshaft and all lifters.
- Repair:Also replace the plastic lifter guide for the lifter that had the damaged cam lobe and/or lifter roller.
- Confirm:A good indicator of a sticking valve is engine misfires that continue to count on an aggressive deceleration with engine braking.
- Confirm:Release the air pressure from the cylinder and work the valve up and down in the guide while turning it 360 degrees; if any binding is felt, a stem to guide clearance concern exists.
- Repair:Refer to the latest version of PIP4753 for decarboning instructions.
- Confirm:Typically, the Cylinder Leakage Test outlined in SI should isolate valve leakage.
- Repair:If a broken valve spring is found, replace the broken valve spring as necessary.
- Caution:If an AFM lifter concern is suspected, refer to the latest version of PIP4568 for additional information.
Open the manufacturer’s document (PDF) ↗ The points above were read from this document.
- Remedy
- This Preliminary Information communication provides information to the technician about vehicles that have a Service Engine Soon Malfunction Indicator Lamp on, engine misfire, and/or engine noise. Technician may find Diagnostic Trouble Codes P0300-P0308. If published Service Information diagnostics does not isolate the cause of this concern technician should check for a worn camshaft lobe and/or lifter roller, a sticking valve, valve leakage, a broken valve spring, and a collapsed active fuel management lifter.
Manufacturer communication2000–2006 GMC YUKON DENALI ・ 2017-08-15
Service Engine Soon Lamp and Engine Misfire Information
1Fault
2Finding the cause
3Correction
What the documents say to do
Single-cylinder misfire (P0300-P0308) and/or chirp, squeak or tick at camshaft speed: worn cam lobe / lifter, valve or valve springConfirm
- If pressing on the valve side of the rocker changes the noise, a lifter and/or cam lobe concern on that cylinder is most likely.
Repair
- If a worn camshaft lobe or lifter roller is found, follow SI procedures to replace the camshaft and all lifters.
- Also replace the plastic lifter guide for the lifter that had the damaged cam lobe and/or lifter roller.
Caution
- A damaged cam lobe is easy to overlook when inspecting through the lifter bores; unworn lifter rollers do not mean the cam lobes are okay.
Read the sentences of the record
Open the manufacturer’s document (PDF) ↗ What is shown here is NHTSA’s summary; the procedure is in the document itself.
- Remedy
- This Preliminary Information communication provides information to the technician about vehicles that have a Service Engine Soon Malfunction Indicator Lamp on, engine misfire, and/or engine noise. Technician may find Diagnostic Trouble Codes P0300-P0308. If published Service Information diagnostics does not isolate the cause of this concern technician should check for a worn camshaft lobe and/or lifter roller, a sticking valve, valve leakage, a broken valve spring, and a collapsed active fuel management lifter.
FUEL SYSTEM, GASOLINE2
Owner complaint2001 GMC YUKON ・ 2005-06-08
Gasoline leakage and check engine light
1Fault
2Finding the cause
3Correction
Read the sentences of the record
- Fault
- DT: 2001, GMC YUKON, VEHICLE HAD GASOLINE LEAKAGE, CONSUMER COULD SMELL LEAK, CHECK ENGINE LIGHT CAME ON.
- Remedy
- DEALER RESET BUTTON.
Owner complaint2001 GMC YUKON ・ 2004-04-01
Engine light and fuel leak while driving
1Fault
2Finding the cause
3Correction
Not stated
Read the sentences of the record
- Fault
- WHEN DRIVING, THE ENGINE LIGHT APPEARED ON THE DASHBOARD. (2 more)
- Inspection
- THE CONSUMER DROVE THE VEHICLE TO THE DEALERSHIP FOR INSPECTION, AND THE MECHANIC DETERMINED THAT THE FUEL PUMP WIRING FAILED, CAUSING THE FUEL TO LEAK FROM THE FUEL TANK. (1 more)
ENGINE1
Owner complaint2003 GMC YUKON ・ 2015-03-06
Broken exhaust manifold bolts causing exhaust leak and engine light
1Fault
2Finding the cause
3Correction
Not stated
Read the sentences of the record
- Fault
- NOW INSTEAD OF 6 BOLTS I HAVE 4 BOLTS.
ENGINE AND ENGINE COOLING1
Manufacturer communication2000–2006 GMC YUKON DENALI ・ 2017-08-15(1 earlier editions of this document folded here)
Engine Check Lamp P0442 Evaporative Emissions System Notification
1Fault
- The service engine soon lamp (MIL) is on for DTC P0442, but a leak cannot be verified with the system test in the service information.
2Finding the cause
Steps to confirm (in the document’s order)
- With the scan tool, command the EVAP system CLOSED, start the engine and watch the tank pressure sensor value for about two minutes.
- If the tank pressure value changes (shows vacuum), remove the purge solenoid and pressurize its fuel tank side with the GE 41413-A / J 41413-A tester.
- If the tank pressure value does not change, install the CH-48096 adaptor between the purge line from the canister and the purge solenoid; use no other adaptor or pressurization method.
- With the EVAP system CLOSED, pressurize through the adaptor and let the system stabilize, watching the gauge for at least 5 minutes, then add smoke.
- Look for smoke or UV trace fluid at the purge solenoid, the engine side, the fuel cap or capless fill door, and the canister vent solenoid filter or fresh-air line.
3Correction
Repair
- If smoke passes through the purge solenoid, replace the purge solenoid.
Caution
- After verifying P0442, do not disturb any fuel system component before testing.
- Test pressure must not exceed 13 in H2O (0.5 PSI (= 3.45 kPa)); more can make components perform inaccurately and lead to misdiagnosis.
- A large temperature difference between vehicle, shop and tester seriously affects accuracy; let the vehicle adjust to shop temperature first.
Read the sentences of the record
From the manufacturer’s document
- Applies to:Applies to 2016 and prior passenger cars and trucks.
- Condition:The service engine soon lamp (MIL) is on for DTC P0442, but a leak cannot be verified with the system test in the service information.
- Caution:After verifying P0442, do not disturb any fuel system component before testing.
- Confirm:With the scan tool, command the EVAP system CLOSED, start the engine and watch the tank pressure sensor value for about two minutes.
- Confirm:If the tank pressure value changes (shows vacuum), remove the purge solenoid and pressurize its fuel tank side with the GE 41413-A / J 41413-A tester.
- Repair:If smoke passes through the purge solenoid, replace the purge solenoid.
- Confirm:If the tank pressure value does not change, install the CH-48096 adaptor between the purge line from the canister and the purge solenoid; use no other adaptor or pressurization method.
- Confirm:With the EVAP system CLOSED, pressurize through the adaptor and let the system stabilize, watching the gauge for at least 5 minutes, then add smoke.
- Confirm:Look for smoke or UV trace fluid at the purge solenoid, the engine side, the fuel cap or capless fill door, and the canister vent solenoid filter or fresh-air line.
- Confirm:If smoke testing finds nothing, the leak may exist only under vacuum: use the scan tool Purge/Seal function to pull a vacuum and watch the FTP sensor parameter for vacuum decay.
- Caution:Test pressure must not exceed 13 in H2O (0.5 PSI (= 3.45 kPa)); more can make components perform inaccurately and lead to misdiagnosis.
- Caution:A large temperature difference between vehicle, shop and tester seriously affects accuracy; let the vehicle adjust to shop temperature first.
Open the manufacturer’s document (PDF) ↗ The points above were read from this document.
- Remedy
- This Preliminary Information communication provides information to the technician about vehicles that have a Service Engine Soon Malfunction Indicator Lamp. Technician may find Diagnostic Trouble Code P0442. Technician will need to review Techlink article from May 2013 titled "Using the Evaporative Emissions System Tester" Technician will need to follow these steps to help diagnose the issue. First after the P0442 has been verified do not disturb any of the fuel system components. The technician now can use the scan tool to close the Evaporative Emissions System. If possible change the tank pressure sensor units from inch_H2O to milimeter_Hg for better resolution. Now the vehicle can be stared to monitor the tank pressure sensor output value for approximately two minutes. If the tank pressure sensor value does change, pressurize the fuel tank side of the purge solenoid with the GE 41413-A / J 41413-A and the necessary adaptors. Now add smoke and allow pressure to stabilize for 2 minutes. If smoke is allowed to pass through the purge solenoid, replace the purge solenoid. If the tank pressure sensor value does not change, then install CH-48096 adaptor between the purge line from the canister and the purge solenoid. With the Evaporative Emissions System closed, pressurize the system through the CH-48096 adaptor and allow the system to completely stabilize, by observing the Press / Vac Gauge for a minimum of 5 minutes. Now add smoke to the system with GE 41413-A / J 41413-A after system stabilization. Now inspect the purge solenoid, engine side, fuel cap, canister vent solenoid filter and any line quick connects. When the leak is unable to be located, test under a vacuum condition. his type of leak may be detected by using the scan tool Purge/Seal function to create a vacuum in the Evaporative Emissions System and then observe the FTP sensor parameter for vacuum decay.
Showing 6 of the 11 you can open. Narrow the search to see the rest.